Rear Suspension Refurb
My goal for the rear-end refurbishment was Everything comes off rusty and mashup and I clean all the parts up and lay them out all shiny and new and build the whole thing back up and slide it into place 😍
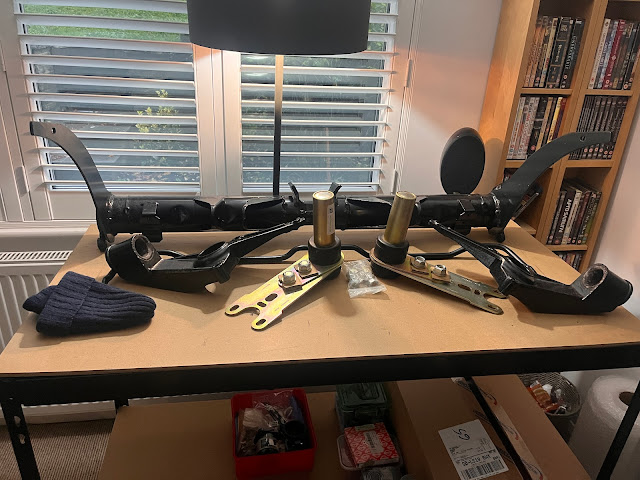
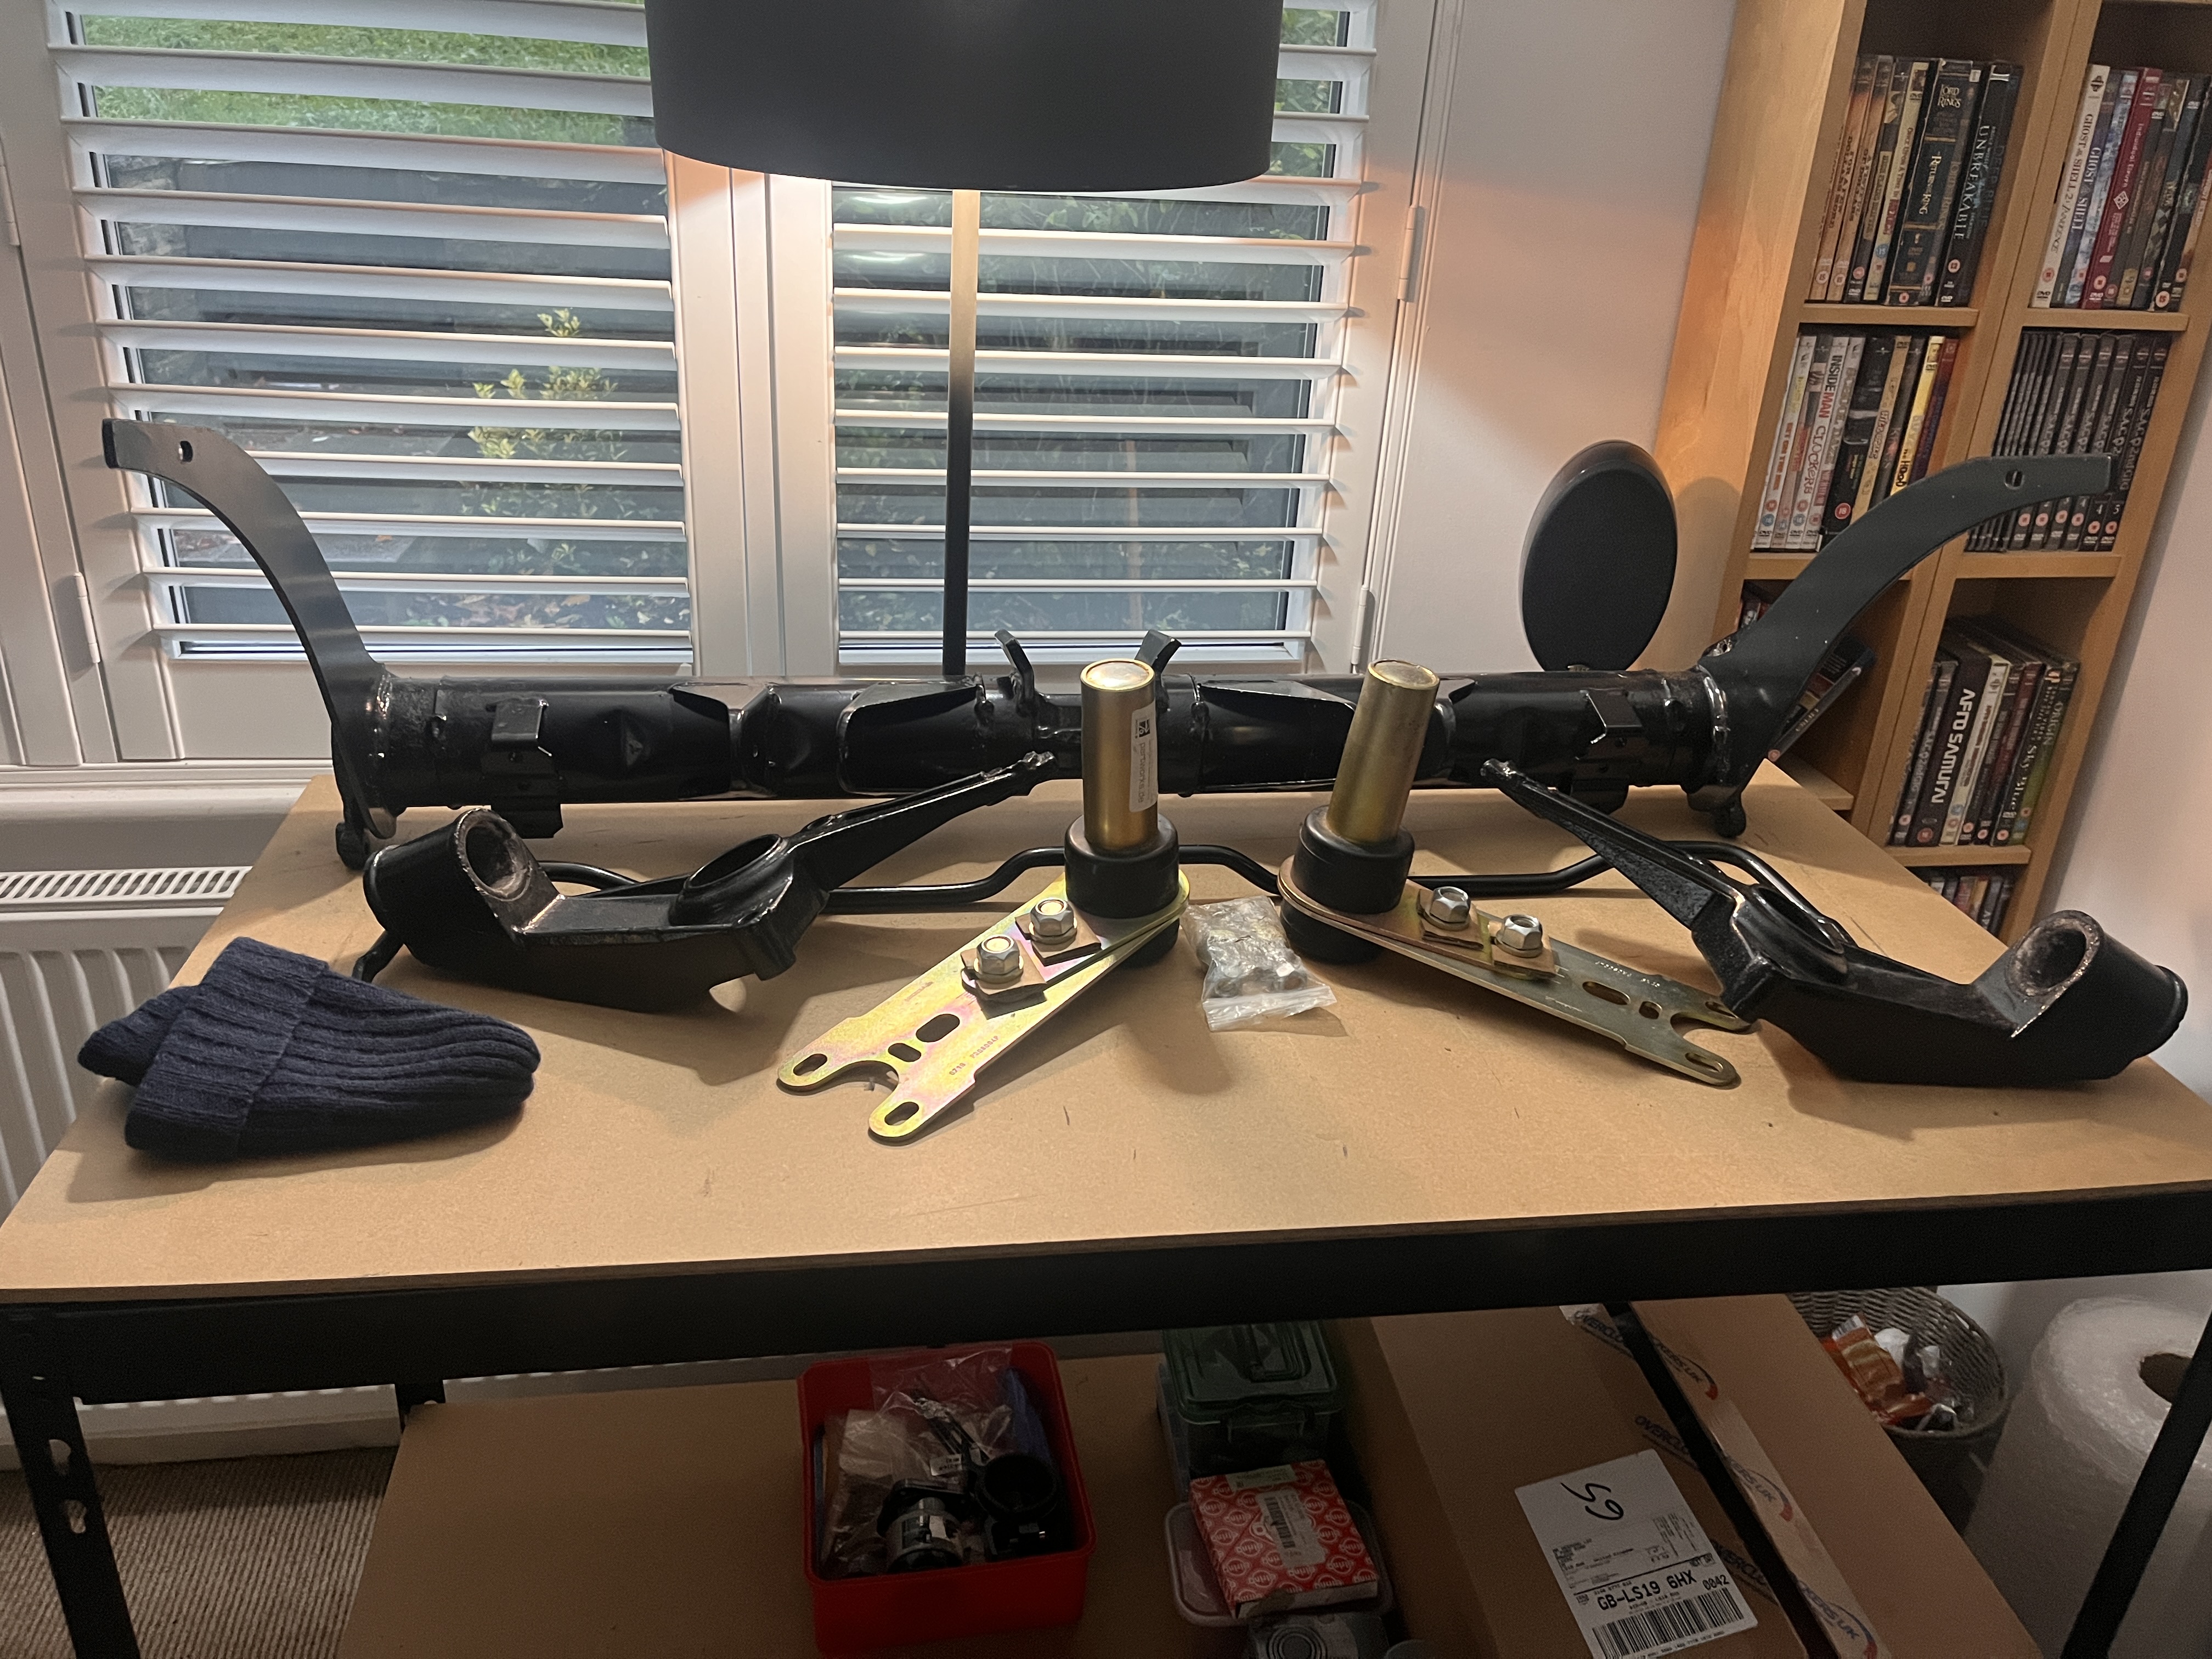
The end result being everything laid out on a bench ready to go in like below. I figured it shouldn’t take too long and be that much effort.

I had previously purchased a replacement powder-coated axle carrier and bearing flanges from a bloke down south who had sold his project and never fitted the refurbished units. This kit came with some new rear axle spring plates from PartWorks.De and some new eccentric double screw ARB bolts.


Got the swing arms bearing pushed in along with the hubs using a bearing tool from Amazon FreeTec 19pcs Master Set Front Wheel Hub Drive Bearing Tool. This new tool made light work of inserting the bearing and hubs, but a 32mm spanner (which you will never use again) and socket are required for the nuts on each end of the threaded bar.


New Powerflex bushes, new handbrake shoes, and new rear discs were added to the swing arms. The refurbished handbrake mechanism was rebuilt, and a new long handbrake cable piece was added, as the old long piece had to be cut out.


Once the handbrake setup is complete, you can add the rear discs to hide all the work you have just done with the handbrake mech. Check the disc spins freely.


All the bolts and handbrake cable mechanism parts from the rear axle were sent away for zinc coating. I stored the bolts in separate containers to ensure that the correct bolts returned to the right places. I had to have several takeaways to obtain the needed containers 😋

I made up some rose-jointed drop links to connect the ARB to the swing arms. These are easy to assemble using one of the many rose joint suppliers available online. The rose joints are M10, and you will need a male, a female and an M10 bolt for each side. Eight rose joint misalignment spacers will be required to ensure the bushes have the space to move when bolted up. The boots help keep the crap off them. The total cost is around £50, which is cheaper than the ones I have seen on sale for the 944 without the rubber boots.


Used some Powerflex bushes for the axle carrier flanges. These bushes are prone to the dreaded squeaking. I had that problem on my Audi TT Mk1, which was a nightmare. Several internet posts suggest using PTFE tape to stop the squeaking. The YouTube guide from Rick Garage shows how to do this. Watch this before fitting Poly Bushes

I put the axle carrier back together with the new spring plates, added the ARB, which was powder coated and replaced the rubber ARB bushes with some new 16mm Powerflex bushes.

I rebuilt the drive shafts with new CV joints at both ends and new CV joint load spreaders at the gearbox end, wire-brushed the drive shafts, painted them with some Por15, and clamped down the boots with stainless adjustable ear clamps. I thought the clamps were called CV Boot clamps until I tried to buy some 😕 Constant velocity joint boot ear clamp

A number of the 6mm bolts had snapped off in the swing arms, drilling these out and Helicoiling them was required. I helicoiled all four, on each swing arm, so if I ever needed to remove the handbrake mechanism or the brake dust shield, it should be easy.


This is the second bearing tool I have bought. The first one, which is below, was crap. Avoid this like the plague. It's a waste of money. The bars bind up quickly, and the thread strips, you have to use a spanner on both ends as the bar always moves up because it binds at one end. It is really so crap. - AVOID

NC944er has a great video on brake refurbishment. His car is not an S2, but the process is identical. It is just different callipers. All his videos are great. Check them out as he does a complete restoration of his 944.
I could not find many pictures of the complete handbrake setup online for reference or the process for re-assembly, so it was a bit of trial and error to start with.
The steps that worked for me were to start at the bottom and hook the handbrake cable into the scissor bracket.
Add the shoes and hook in the bottom spring, then hook in the two side springs.

Once that is done, you can move to the top and add the adjustment wheel. And then, finally, the top spring. the top spring rests against the bottom of the adjustment wheel to give you a firm click when adjusting the handbrake shoe position.


There were a number of parts that needed replacing, which were expensive and difficult to find.
I got the long part of the handbrake cable and cover plates from Design 911. The plastic clips were from PartWorks.De in Germany.
The new rear shock mounts were added. These needed a 38mm spanner (which I will never use again 😒) I built up the passenger side swing arm and stuck them on the desk for storage as I need the space in the garage to drop the gearbox and torque tube.

The rear mounting for the bearing flange brackets were shafted, I had seen some solid mount conversions on eBay for £140 and the new ones for £204 at Design 911 Rear Axle Spring Plate Mount.
The completed refurb took much longer than expected due to the size of the parts and complexity of the setup, with most of it needed replacing or refurbishing.

